Materials needed:
1. I used wrapping paper with graph lines on the back to create my pattern. It made it easy to measure and I didn't have to tape papers together. You may use whatever you like. To make the pattern you will also need a large compass or you can make your own.
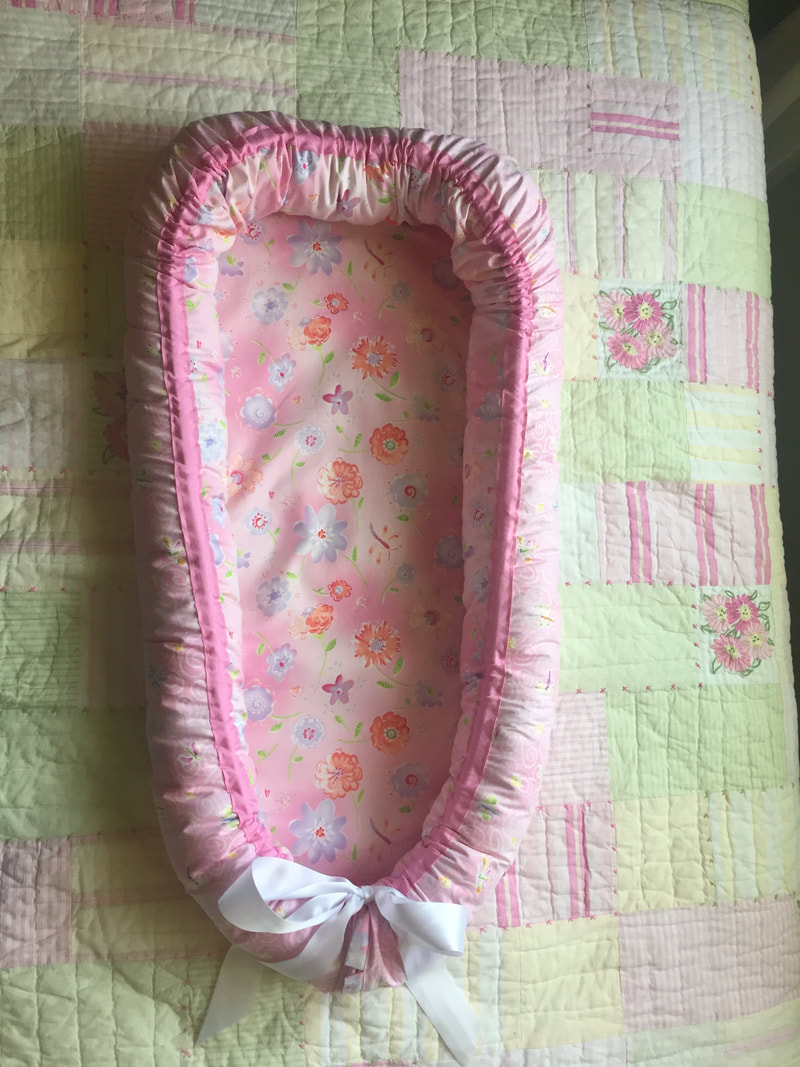
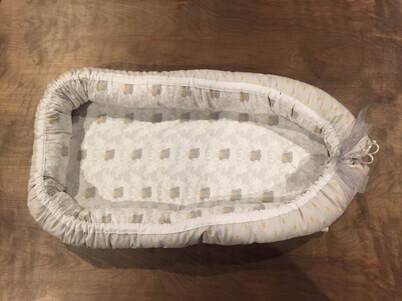
2. About 2 1/4 yards of fabric. From the above picture you can see that I chose two different fabrics. You only need 2 1/4 yards total so if you chose two different fabrics then just 1 1/8 of each.
3. Fabric for the lining if you chose to line. I lined the foam that goes on the bottom and I made a tube lining for the fill around the sides. For this I used an old white sheet. The lining for the tube is about 90"x11.5" so I just measured 11.5" on the side of the sheet, made a cut and tore the sheet down the cut. I then sewed along one of the 11.5" sides and then the 90" side leaving one end open for filling (of course you close it after). It was super simple. This just makes things easier to clean. If you don't want to then you don't have to but you will need to sew the sides and bottom shut of the baby nest as I leave them open.
4. 1 inch bias tape that matches your fabric. You will use pretty much an entire package.
5. Ribbon cut to desired length. This will be thread all the way around the edge of the nest (under the bias tape) and tied in a bow at the bottom. It is up to you how big your bow will be.
6. Two small pieces of cord about 6-9 inches used as a tie to keep in the lining tube.
7. One piece of 1/2 inch foam approx. 13"x28"
8. Fill for the tube. I used down from a pillow. You can use polyfill or whatever you like.
1. I used wrapping paper with graph lines on the back to create my pattern. It made it easy to measure and I didn't have to tape papers together. You may use whatever you like. To make the pattern you will also need a large compass or you can make your own.
2. About 2 1/4 yards of fabric. From the above picture you can see that I chose two different fabrics. You only need 2 1/4 yards total so if you chose two different fabrics then just 1 1/8 of each.
3. Fabric for the lining if you chose to line. I lined the foam that goes on the bottom and I made a tube lining for the fill around the sides. For this I used an old white sheet. The lining for the tube is about 90"x11.5" so I just measured 11.5" on the side of the sheet, made a cut and tore the sheet down the cut. I then sewed along one of the 11.5" sides and then the 90" side leaving one end open for filling (of course you close it after). It was super simple. This just makes things easier to clean. If you don't want to then you don't have to but you will need to sew the sides and bottom shut of the baby nest as I leave them open.
4. 1 inch bias tape that matches your fabric. You will use pretty much an entire package.
5. Ribbon cut to desired length. This will be thread all the way around the edge of the nest (under the bias tape) and tied in a bow at the bottom. It is up to you how big your bow will be.
6. Two small pieces of cord about 6-9 inches used as a tie to keep in the lining tube.
7. One piece of 1/2 inch foam approx. 13"x28"
8. Fill for the tube. I used down from a pillow. You can use polyfill or whatever you like.
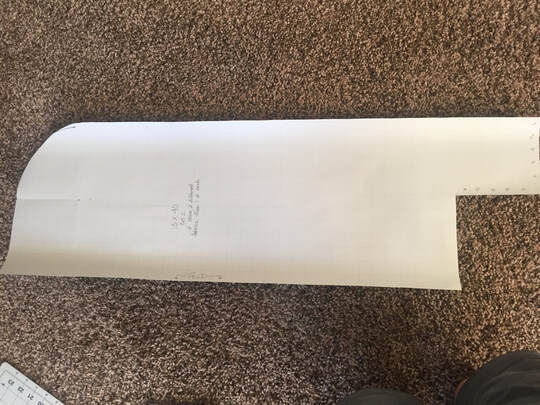
This first pattern is made by cutting a rectangle that is 13 inches by 40 inches (I have since found that the 1/2 inch pad you will use later comes in a width that makes it better to do the pattern at 13x39). In one corner of your rectangle (top right on the pic) you will count in 6 inches and up six inches then over 7 inches and remove that section leaving a "leg".
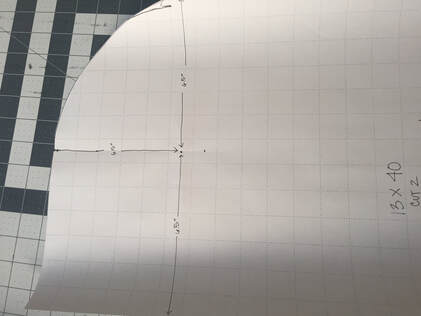
To make the arch on the main pattern measure in 6.5 inches from the side and the top. Place a compass on the center dot (shown on pattern) stretch a compass from the dot to the top of the pattern and draw your arch.
To make the arch on the main pattern measure in 6.5 inches from the side and the top. Place a compass on the center dot (shown on pattern) stretch a compass from the dot to the top of the pattern and draw your arch.
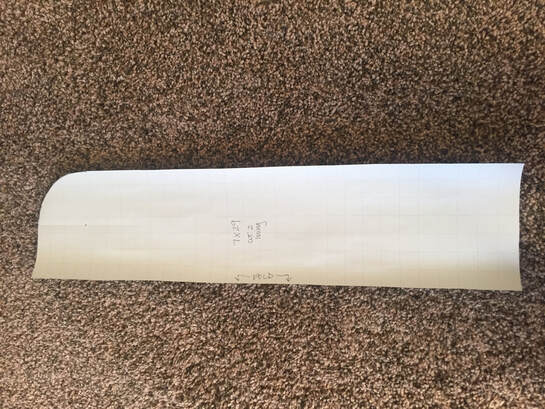
This second pattern is used as a guide later and is used for the lining of the pad that will be inserted. Cut your pattern at 7x29.

To make the arch on the smaller pattern simply measure in 3.5 inches in each direction and use the point to place a compass that will stretch from the point to the top and side of the paper. Draw and cut out your arch.
|
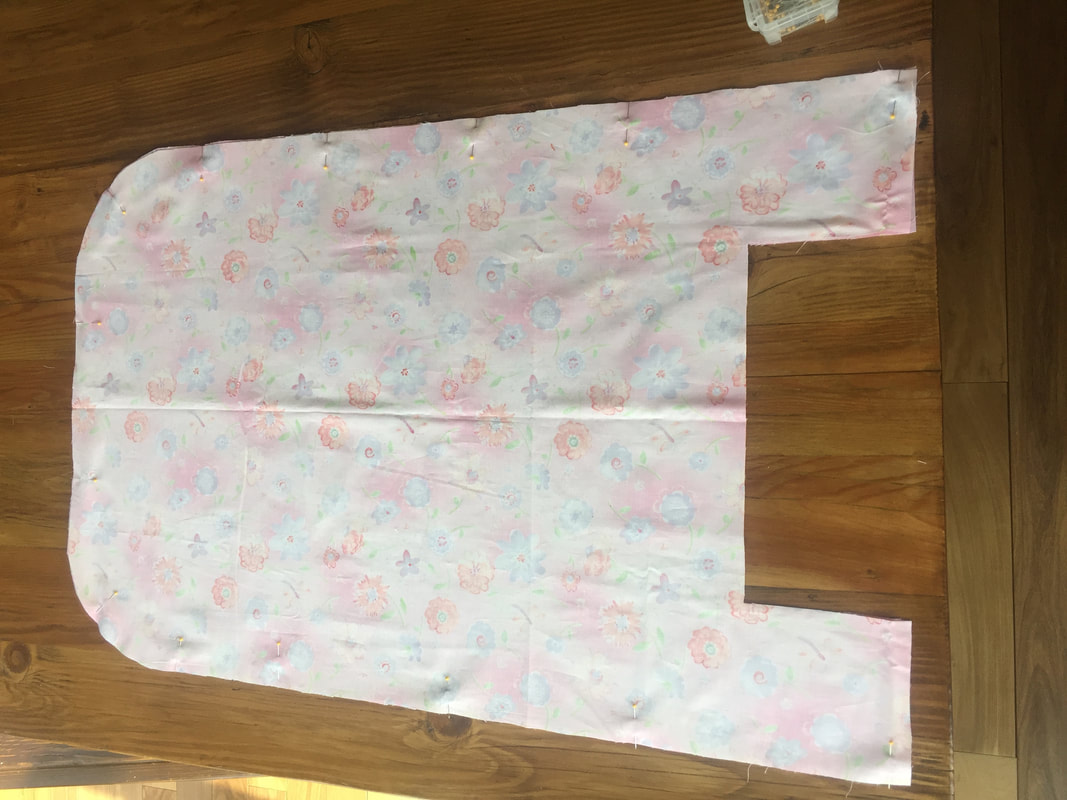
Cut out two pieces of your main fabrics using the large pattern you created. Place them with right sides together and sew along the outside edge using a 1 cm or 3/8 inch seem allowance.
|
|

|
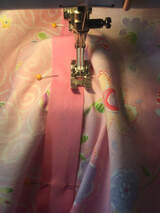
Turn your fabric to the right side. Now using your 1 inch bias tape (or ribbon if you prefer). Measure up one inch from the bottom on either side of the seam that you just created. Place your bias tape directly over the seam and pin from one end of the seam all the way around to the other. You will sew this on both edges of the bias tape. Later you will insert the ribbon here.
|
|
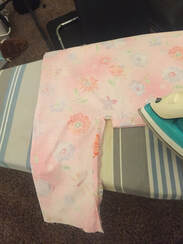
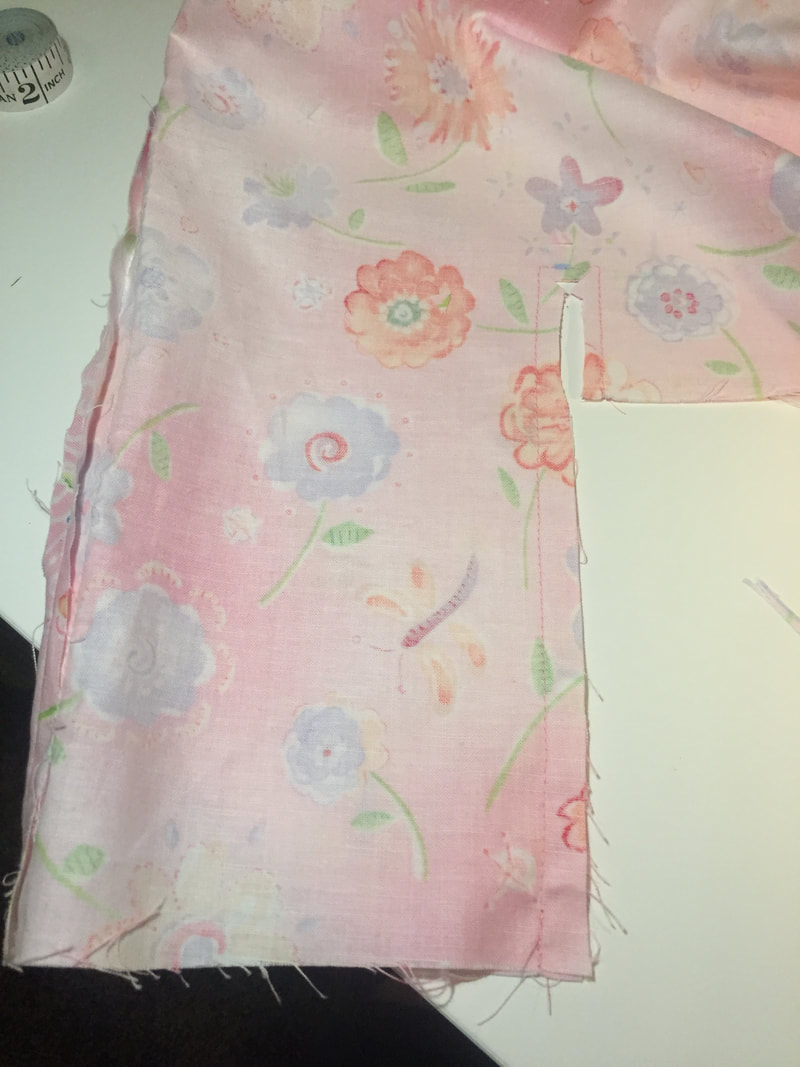
After sewing on the bias tape turn the fabric again to the wrong side. As shown in the picture right, measure up the inside of the "leg" 1 1/2 inches and cut. Sew up the leg and around the cut using the 1 cm or 3/8 inch seam allowance. Do this to both legs. Turn the middle section twice as shown below and press.
|
|
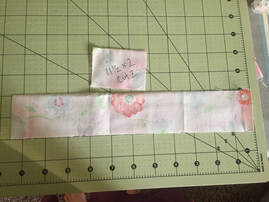
Cut two strips of fabric at 11 1/2 x 2 inches. Press the short ends in about 1/4 inch and press. Fold the fabric in half with the wrong side on the inside and press.
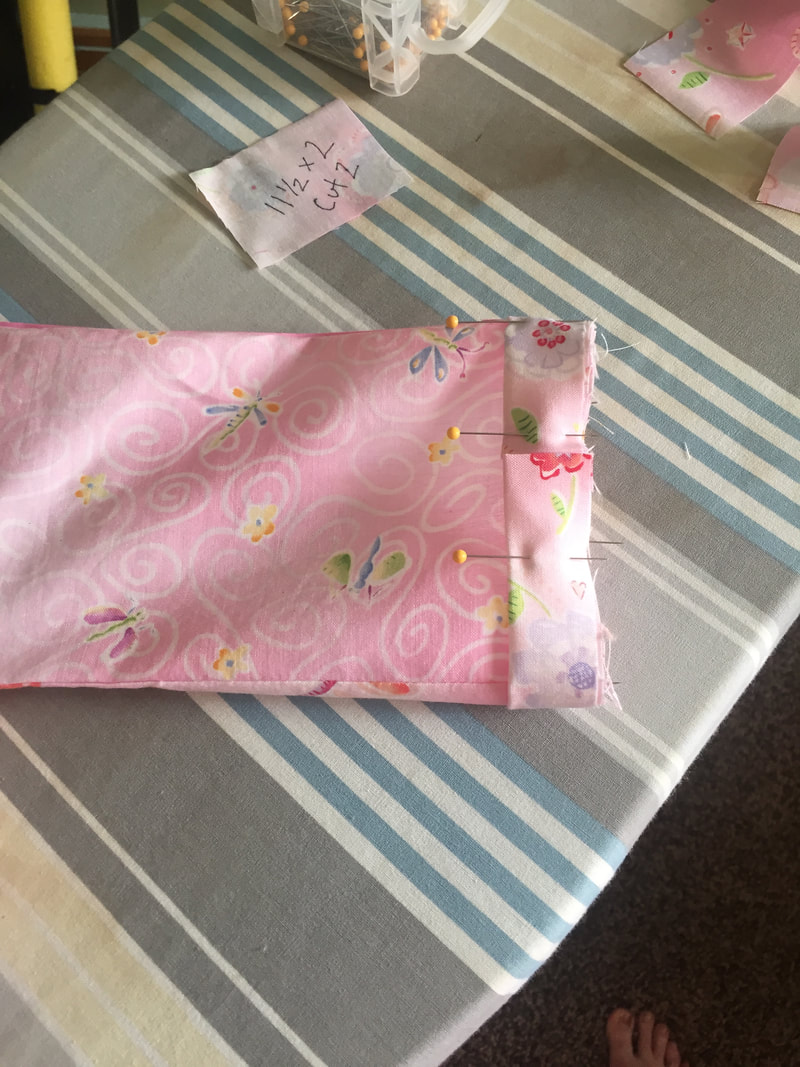
Pin this piece of fabric as shown below to the bottom of your leg leaving an opening to pass a ribbon through. Stitch in place then fold the piece so it looks like the second picture below. Iron and stitch to hold in place.
Pin this piece of fabric as shown below to the bottom of your leg leaving an opening to pass a ribbon through. Stitch in place then fold the piece so it looks like the second picture below. Iron and stitch to hold in place.
|

|
|
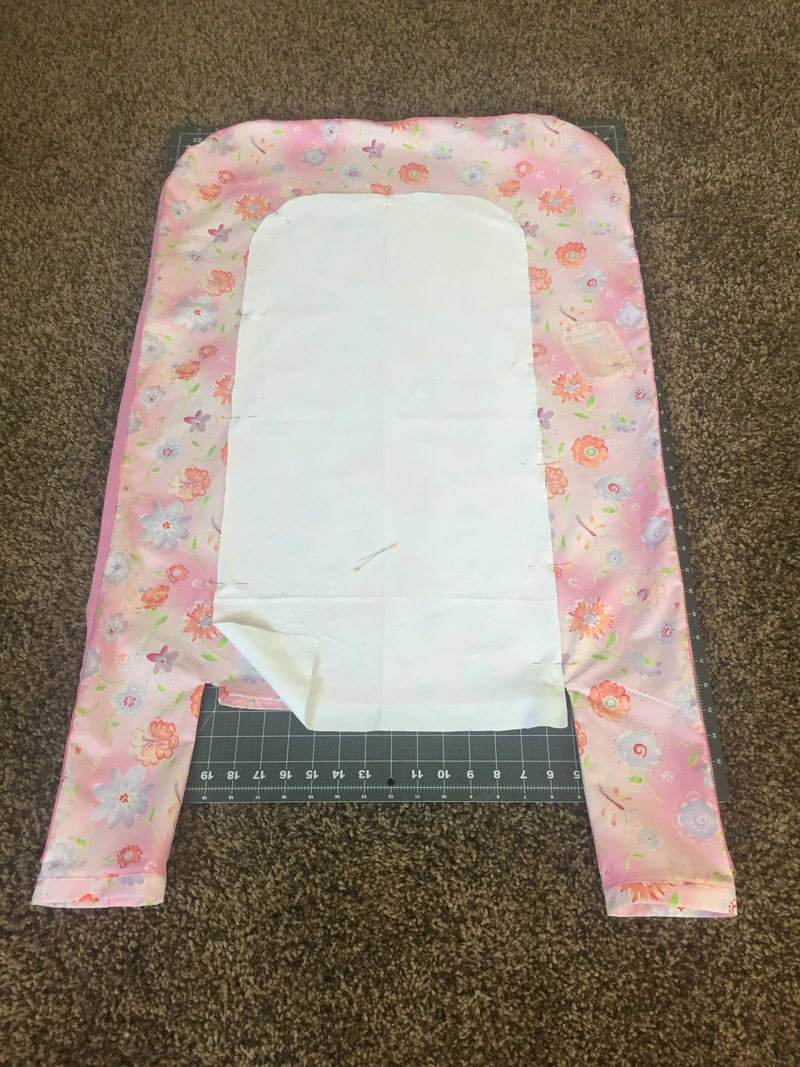
Using the smaller pattern you cut out in the beginning, cut a piece of fabric to use as a guide for the next step. You can either pin this piece on and sew around it or you can use fabric chalk and draw around the pattern piece. Pin all of your fabric well so that it doesn't move when you sew around the pattern piece. This seam will separate the tube section from the middle section. DO NOT SEW THE BOTTOM SHUT this is where you insert your foam bedding piece.
Once the seam is sewn you can insert your ribbon. Feed it through the bias tape using a safety pin. 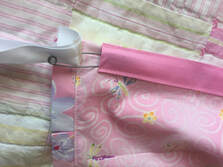
|
|
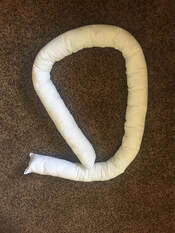
I honestly don't have the dimensions for the tube. It is 11 1/2 inches wide by around 90 inches long. What I typically do is take a queen size sheet and measure down 11 1/2 inches, make a cut and tear the piece out. Sew one end and down the side leaving the other end open, turn and stuff.
|
|
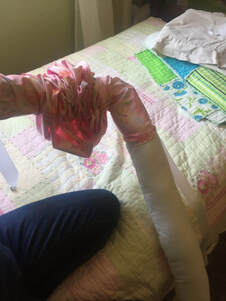
To get the tube inside I feed my arm through the entire section made for the tube, grab the tube and work it through. It really isn't too hard. Run a piece of small ribbon through the bottom of both feet to close off the tube.
Now cut out your middle foam piece. Use the fabric piece you cut out from the smaller pattern as your guide. You can then place your foam in the center of your nest in the pocket you created earlier. If you would like you can cover the foam with an additional covering before inserting.
If this is a bit confusing just watch a few Youtube videos and that may help. This is honestly the easiest way I have found to make a pattern for a baby nest and to finish the nest.